Sales Pipeline Workflow
Overview
Jira can be easily used to manage your sales pipeline, especially if you're not keen to invest in other software tools such as SalesForce.
A simple workflow such as this one can easily track your qualified leads and opportunities from fruition to conversion.
Sales pipeline
At New Verve, we track two main types of issues in our sales pipeline:
- Lead (default)
- Quote
The key steps for a sales qualified lead for us from intent to conversion are:
- Sales make initial contact
- The lead goes through further qualification (we 'fact find' and carry out pre-sales analysis)
- A proposal is built by presales and includes a price quote
- The proposal is reviewed, negotiated and refined
- The proposal is accepted or rejected
- If accepted, we then plan the work in collaboration with the customer and our solutions team
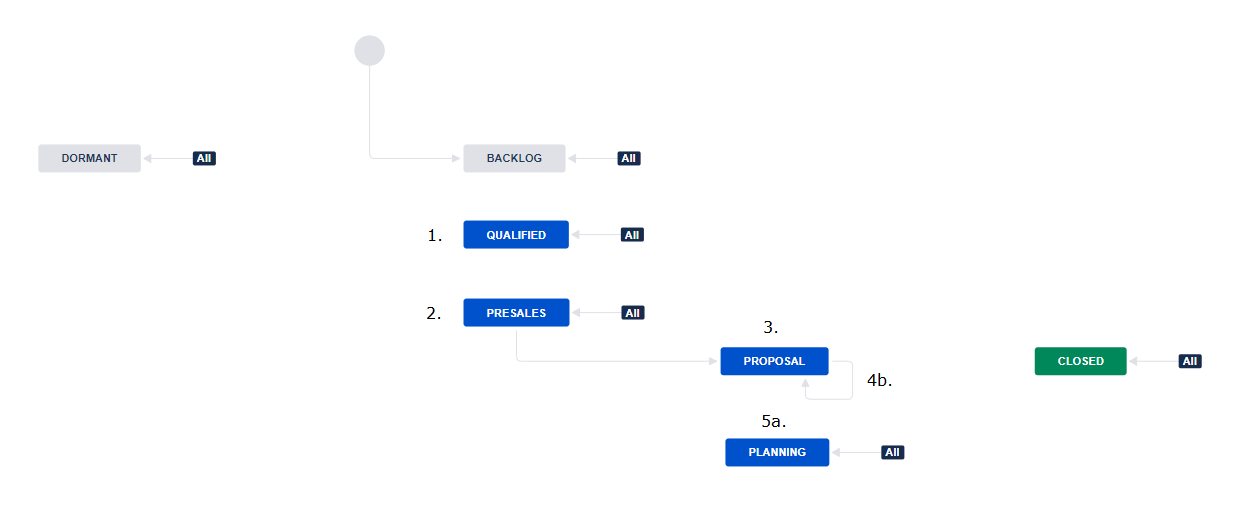
The above steps in the journey correspond to these statuses in Jira:
- QUALIFIED
- PRESALES
- PROPOSAL
- Either:
- Back to PRESALES (number of revisions is incremented)
- Lead is chased (number of follow-ups is incremented)
- Either:
- PLANNING (resolution is set as 'Won')
- CLOSED (resolution is set as 'Lost')
- CLOSED
Priorities
Not all sales leads are equal. Your sales team should prioritise efforts so that you're spending time with the prospects that are most likely to convert.
We differentiate our sales leads by heat - e.g. cold, warm, hot. These map directly to Jira priorities.
The BANT method is often used to determine how 'qualified' a lead is to work with.
- Budget - what are the customer's pricing expectations? Can they afford to work with us and how much flexibility do they need?
- Authority - is our contact a final decision maker? The last thing we should do is spend significant time in pre-sales with somebody who doesn't have any authority.
- Need - what problem needs to be solved and with what priority?
- Timeline - when would the customer like the solution and are expectations realistic?
There are lots of other models in the industry, but ultimately they all come down to the 4 key elements above.
| Jira Priority | Heat | Budget | Authority | Need | Timeline |
|---|---|---|---|---|---|
| Highest | HOT | Budget is ready for disposal | Contact is the key decision maker or recommender | Specific need has been identified | There is a clear and realistic timeline |
| High | WARM | The lead is still considered likely to convert, but has 1 disqualifier (e.g. authority) | |||
| Medium | LUKE WARM | The lead has 2 disqualifiers | |||
| Low | COLD | The lead has 3 disqualifiers | |||
| Lowest | FREEZING | The lead is unlikely to convert and may need long-term nurture | |||
Prerequisites
We have created various fields for capturing information about sales qualified leads. These are then used in the workflow post functions, validators, and automation rules.
- Last follow-up (date)
- Number of follow-ups (numeric)
- PO Ref (text)
- Revisions (numeric)
In addition to the above, at New Verve, we capture lots of other useful information such as effort ballpark (days), scheduling information, scope details etc. The fields you add will ultimately depend on what information you need to collect before handing the lead to your pre-sales team.
Depending on your reporting requirements, you could use different 'Done' statuses in your workflow. We just use one and capture resolution instead (i.e. the reason why it's closed). Resolutions we utilise are:
- Won
- Lost
- Declined
Workflow configuration
Post functions and validators are not included in the workflow bundle. We've described them below so that you can recreate them.
Post functions
Post functions carry out additional processing after a transition is executed.
Start Status | End Status | Transition | Post Function |
|---|---|---|---|
| All | Dormant, Backlog, Qualified, Presales | N/A | The Resolution of the issue will be cleared |
| All | Planning | Plan Delivery | The Resolution of the issue is set to 'Won' |
Validators
We advise putting in place these validators:
Start Status | End Status | Transition | Validator |
|---|---|---|---|
| All | Closed | Closed | If a value for the field PO Ref is not provided during the transition, show the following error: PO required |
Transition screens
Transition screens are handy for capturing information as part of a transition. We recommend the following:
| Transition | Start Status | End Status | Screen | Fields to add | Additional notes |
|---|---|---|---|---|---|
| Chase lead | Proposal | Proposal | Screen to capture the date for the last chase. | Last follow-up date | |
| Closed | Closed | Closed | Screen to capture information about whether the lead was won or lost. If the lead converted, capture information about the order (e.g. Purchase Order reference). | Resolution, PO Ref | To restrict which resolutions are available, add a comma-separated list of resolution IDs to the Closed transition. E.g. jira.field.resolution.include = 10100,10500,10501,10400 |
Automation rules
You can utilise the native automation engine in Jira Cloud to set up some handy rules. At New Verve, we have implemented the following:
- When a lead is chased (4b), add 1 to the 'Number of follow-ups' field
- When the 'Last follow-up' date is edited, add 1 to the 'Number of follow-ups' field
- When a lead goes back to pre-sales (4a) from Proposal, add 1 to the 'Revisions' field
- When a lead converts, send a notification to collaborating teams - e.g.:
- marketing - ask your marketing team to update your contact lists and seek opt-in to your newsletter
- operations - ask your ops team to create a new Confluence space and Jira project to track work for the customer (or even better, automate it entirely!)
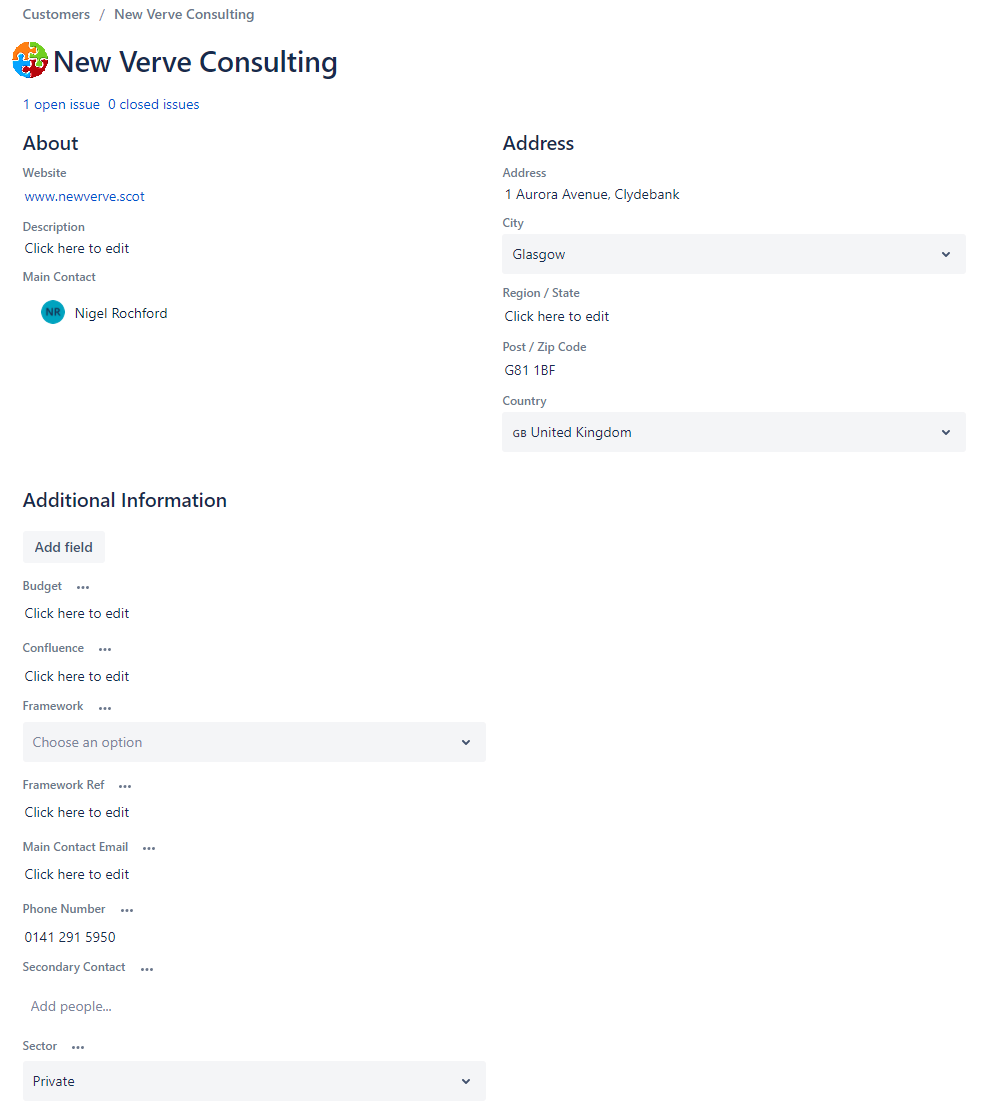
Capturing customer information
We have developed an app for Jira Cloud to capture information about your leads and link these to your qualified sales leads: Crumbs - simple CRM for Jira and Jira Service Management.
This ensures that everybody involved in the sales process can easily access client information in context.

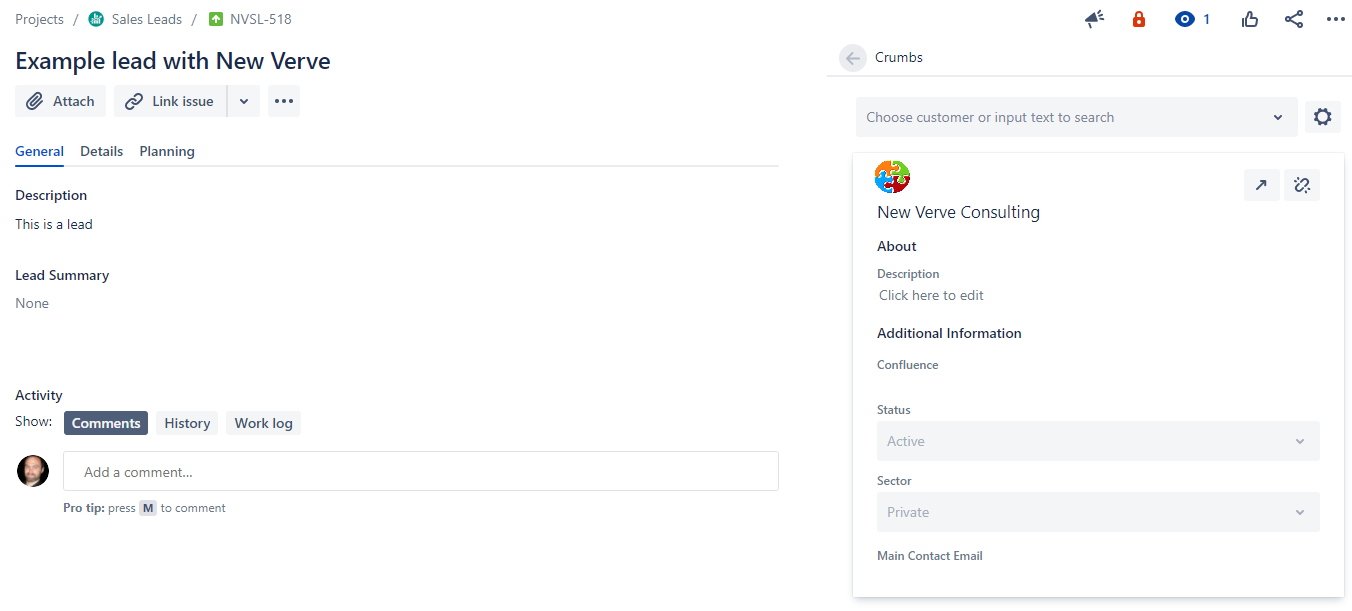
In practice, this would look like the following. When a lead is created, your sales person expands the 'Crumbs' issue glance.

They then, either:
- link an existing customer in your Crumbs database
- create a new customer and edits their details
Full details for the customer can be managed by clicking ![]()